Wednesday, June 20, 2012

Keep on Truckin'

My youngest daughter recently graduated from college and received her Master's Degree and moved to Philadelphia (which is about 2 hours from home) to accept a teaching position.  My husband's friend was kind enough to let us use his truck (it was red) so that we could move her bedroom set.  The Just Because cartridge had a cool truck that I cut out at 5".  The card base is 6-1/2 x 5 matted twice.  Added red, white and blue buttons and added twine.  The window is embossed using the swiss dots folder and the truck cab is embossed using the forest branches folder.  I used a white gel pen to stitch the tires and added a thank you sentiment in the corner.  On the inside I used My Creative Time's gift card holder die and embossed it using the see spots folder.  Added a red band and used another circle die from my stash.  Embellished the center with a handwritten "E" for his last name.  Inside is a nice gift card that he and his wife will surely enjoy. 

Tuesday, June 12, 2012

Wedding Bells Are Ringing

My daughter attended a wedding this past weekend of a college friend.  I pulled out my Weddng,Tie the Knot and Elegant Edges cartridges.  My card base is 6-1/2 x5.  My second base is cut from Elegant Edges at 5-3/4 x 4-1/4.  I cut another small card on my trimmer at 4-3/4 x 6-1/4 and folded in half to make another card.  Mr. & Mrs. is cut from Tie the Knot at 3-1/45 x 1-1/2.  The white sparkle strip is cut at 3/4".  The silver frame is cut again from Elegant Edges at 2 x 1-1/5.  The flower is cut from My Creative Time die cut secured with a little bling from my stash.  I also made my envelope from the Wedding Cartridge to match the base of the card.  That was cut at 11.30 x 6.40 inches.  I really had fun making this card which was inspired by a card that I seen in the Stampin Up magazine.  My daughter told me the wedding was beautiful and she had a fun time at the reception.


Thursday, June 7, 2012

Baseball Card - HOMERUN!!!

My daughter asked me to make some baseball "thank you" cards for my granddaughter's coaches.  Using the Sports Mania cricut cartridge and my Gypsy, I welded 2 baseballs approximately 5 1/2 inches each.  I had to flip one of the baseballs so that it lines up evenly. Using the blackout feature I cut the red circles using the same process, weld and flip.  The baseball player is cut 4" and the sentiment is cut at 2 1/2 inches all using the Sports Mania cricut cartridge.  The stamp is from the dollar bin at Wal Mart.  She'll sign her name at the bottom and then it's a HOMERUN!!


Wednesday, June 6, 2012

Hip Hip Horray...Last Day of School

Today is my granddaughter's last day of school.  She loves to make arts -n- crafts with her Mom-Mom so I decided to make something quick and easy.  I used her school colors, blue and gold and made some lollipop holders using My Creative Time stitched lollipop holder die and the scallped and stitched circle dies.  I found a clip art on line "Have a Safe Summer" and cut those out at one inch.  The other item is a cello bag full of cheddar flavored crackers made like fish.  I cut out a 4 inch topper and pasted the clipart.  It reads "Thaks for helping us Swim thorugh the school year" - 2nd grade - Mrs. Bracht.  Have a great summer guys and we'll see you in the 3rd grade.

Get Well Soon

I made this card for a family friend who is in the hospital.  I used the card base from a pack of cards that I purchased at AC Moore on sale.  I love the polka-dots.  The Get Well Soon was cut from my Cricut Phrases cartridge at 3 inches.  I cut a piece of burlap and adhered it to the card with some glue.  I used My Creative Time Rolled Flower Die to make the flowers and distressed the edges with some Tim Holtz tea dye.  I slit a small hole on the side of the card and adorned some black tulle and tied it in a bow and topped it off with a green button.


Tuesday, May 29, 2012

Butterfly Lucy

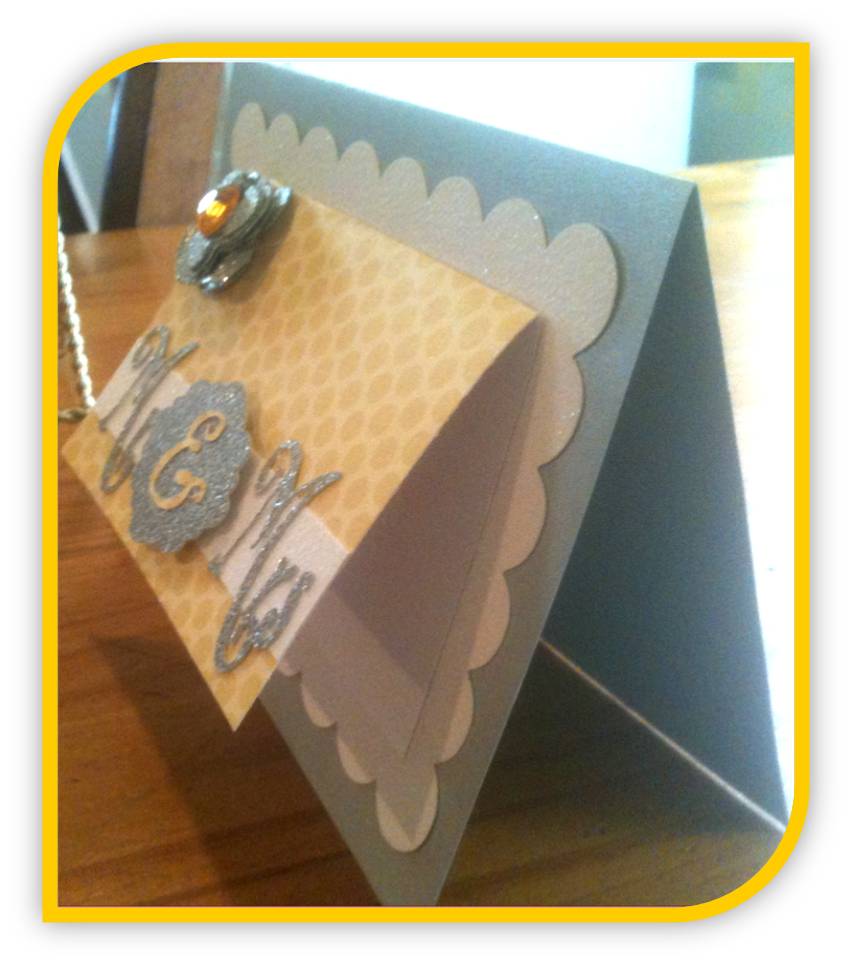
I made this 4x9 card using Die Cut with a View (DCWV) paper.  I believe it's from the Lemon Grass collection.  I just love butterflies, so with that in mind, I made this simple, but beautiful, elegant card.  I don't know what I will use it for, therefore I left the sentiment section blank.  That way when I'm ready to use it all I have to do is stamp a sentiment in that section.  I actually made 2 of these at the same time so I can keep them handy.  I just love the way this turned out.  I love yellow and gray together.  The butterflies are from the Create A Critter Cartridge and the frame is from Elegant Edges.  The butterflies are cut at 2 inches which have some bling right in the center and the frame is cut at 3 inches anchored by 2 buttons I found in my stash.


Thursday, May 10, 2012

LiL Gardenia Card

So I have another quick card that I made for my granddaughter.  She was the prettiest gardenia flower in her school play.  I made this card and gave a bunch of flowers after the play.  There were so many cute little girls in the play but naturally our "lil gardenia" was the cutest.  I  used all glitter paper on the front of the card and stamped a flower on the front and filled it in with stickles.  The word "Cherish is stamped in the top right corner, tied a little bow in the left hand corner and placed some bling to make it pop.  The inside of the card is a stamp of a large flower on glitter paper using my embossing powder and embossing gun. 

Friday, April 27, 2012

Spring Music Concert Card

Last night I attended my nephew's Spring Music Concert, so I decided to make him a quick card.  And quick it was, but I think the card turned out pretty nice.  I didn't have a lot of time to work with because I wanted to make sure I was there on time.   I used a single music note found on Gypsy Wanderings which was preloaded on my Gypsy and cut it out in black paper.  The base is red paper and I just love the music note paper that my friend had given me.  I popped the music note on some foam dots and stamped "Congratulations" on the bottom.  The black strip at the bottom is cut at 1-1/2 x 5, the red strip is cut at 1-1/4 x 5 and the cream strip is cut at 1 x 5.  The card base was purchased at Michaels.  You can buy those along with the envelopes pretty cheap.  I believe I got mine at 2 boxes for $7.  I have the cream and white with matching envelopes.  My nephew enjoyed it, especially the "green" part that was inside the card.  (he he).

Inside of Card
Envelope
 

Monday, April 23, 2012

Personalized Water Bottles

Last year, I made these water bottle holders for my husband as a way to say thank you to his clients.  I used TBBM cricut cartridge to make the holder.  I cut the door holder using the shadow feature, cut the top portion and folded it so that the holder can hang off the water bottle.  I inserted a flavored Wylers singles packet and a personalized piece of gum.  I designed my own gum wrapper in a Word document cut them out and wrapped them around the gum.  I also personalized their name by typing them in a Word document and punching them out in a 1" circle.  I used the Wild Card cartridge to cut out the "Thanks".  They were a hit and I really enjoyed making these. 

Tuesday, April 10, 2012

Sneak Peak

I'm working on a project for a 2012 Fall wedding and here is a sneak peak.  I used Flower Shoppe to cut out the buds that go inside of the flower.  I couldn't resist forming the words "I Luv Lucy".  I'll reveal the finished product soon.  The buds are purple and gold and I inset a bling in each one.  Can't wait until the unveiling of the finished product.

Monday, April 9, 2012

Fun Easter Baskets for my Children

I made some Easter basket treats for my children.  They were all home this weekend and my husband cooked a great meal (as usual).  Did I mention that he was a wonderful husband and father and the best cook.  Their Easter baskets were filled with candy and chocolate.  I also put in a special gift for each of them.  This was a spin-off from my granddaughter's Easter baskets I made for her elementary class.  My kids enjoyed them, especially the treats inside.  I also made one for my nephew.

Friday, April 6, 2012

Halloween Favor Treats for Tamia's Class

These awesome treat boxes were a hit in Tamia's classroom for Halloween.  I must admit that this project was time consuming, but it was well worth it.  You can see the pictures below of some of the things that were inside.  I also had other candy inside of the boxes.  I used my Create-A-Critter cartridge on this project and just went all out. 


Easter Baskets for Tamia's Class

I made these "ka-ute" Easter baskets for my granddaughter's 2nd grade classroom at Fink Elementary School.  They are stuffed with reeses, lollipop, laffy taffy, 2 plastic eggs stuffed with more candy, a little egg-shaped note pad and a pencil.  On the sides of each basket is a decorative, sparkle egg-shaped embellishment and a cut out of a Easter bunny hopping on the grass that goes around the base of the basket.  We color coordinated the handles with Easter paper.  My granddaughter and I had fun making these baskets.  Of course we had to sit through 20 episodes of ICarly as we assembled the baskets.  (ha ha).  I heard when she went to school the next day all the children were HOPPING to get their Easter basket treats!!!


Get Well Card for Major

Here is a card I designed for a 10 year old brave little boy in the hospital.  I thought it would be neat to make his name (Major) into a card.  Of course, little boys love to play or watch some sort of sport, so I incorporated his favorite sport balls on the front of the card.  I think it turned out super Kool.  I understand that he enjoyed seeing a card with his name.  On my gypsy I welded his name and was able to make it a stand up card.  My family signed the inside of the card with lots of "get well wishes."

Purse and Gum Holder Favors

A friend of mine asked me to make some favors for her lil princess to hand out after their dance recital.  I wanted to make something that little girls would love.  So I decided to make purses (of course with bling and pearls).  A girl MUST have her bling and pearls.  When they open up their purses, they will find a treat.  Also, they will have a personalized stick of gum with their names inside a gift card holder purchased at http://www.creativetimeforme.com/ (Emma, I just love her creative energy)!!!  Little Jayla will be the hit of the ball!!!

Keepsake Shadow Box

I really enjoyed creating this special shadow box for a special "lil lady".  My cousin and his wife had their first addition added to the Hairston Clan in March.  I decided that I wanted to make something memorable that she could keep for years to come.  I think they really enjoyed it.  I also made tags (which are not shown) for the parents, grandparents and great-parents to write a personal sentiment to "Lil Sage".  As she gets older she will be able to reflect back on how her parents felt the day she was born.  These tags will be tucked away in the back of the shadow box for her to read when she gets older.

Birthday Card for Christian's Friend

I had fun making this birthday card for my nephew's friend.  They are true "skater dudes".  My sister asked me to come up with a card the night before and this is what I came up with.  I love last minute projects.  Thanks Jennifer!!!  (ha ha).  The skater was created with my Cricut Everyday Paperdoll cartridge.  I embossed the Happy Day background with my Cuttlebug using the Happy Birthday embossing folder and used the mosaic layout for the birthday boy's name.  I think it turned out really Kool.  Not only was this a birthday card but this could be a keepsake for Darien to keep in his room on top of his dresser.  Hey nephew, I had fun making this card.  Thanks for challenging me!!!